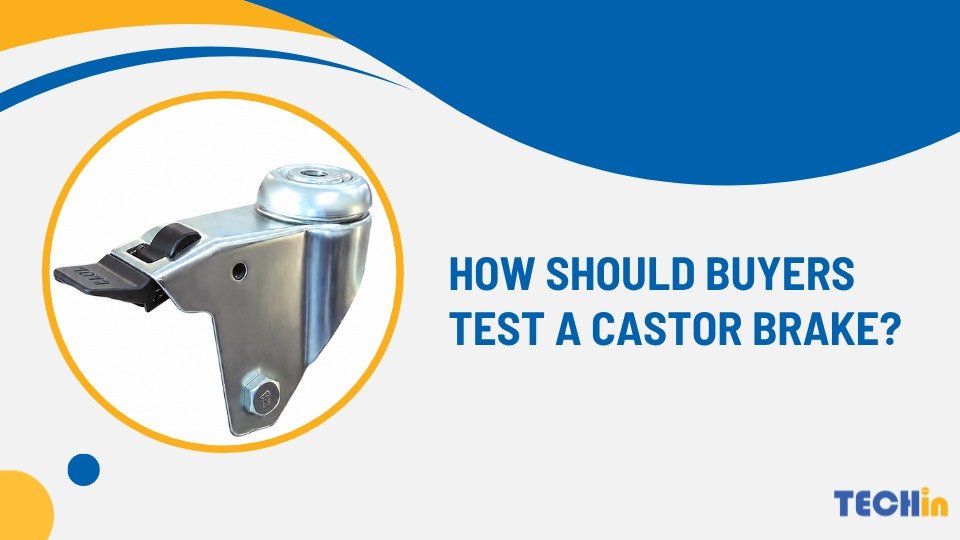

A castor can have the correct wheel and load rating yet fail at the mounting plate. Burrs or undersized holes can stop bolts seating and delay assembly.
Buyers can prevent castor mounting hole fit problems by specifying the hole diameter, tolerance, hole pattern, plate size, thickness, and burr limit together. They should then verify the first parts and delivered castors with a defined gauge and assembly check.
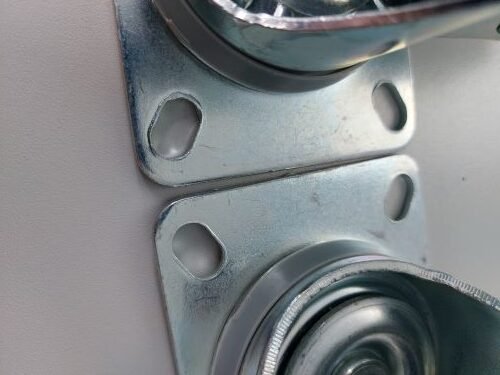
Visible burrs around castor top-plate holes can interfere with bolt fit.
A customer contacted Techin Castor after receiving swivel castors with burrs around the top-plate holes. The customer reported a required 14 mm hole, with some examples measuring 13.45 mm. The photographs show uneven hole edges, while the measurement came from the customer’s email. We checked the plate mould with the production team and confirmed wear. Later correspondence stated that the moulds were OK. The buyer lesson is broader than this case: define the mounting interface before production and check both size and edge condition before assembly.
What Dimensions Define a Castor Mounting Fit?
A top plate is a mating interface, so one dimension cannot prove a correct fit.
The buyer should record these items in the drawing, purchase specification, or approved product data:
| Item | Why it matters | What to define |
|---|---|---|
| Top-plate length and width | Confirms that the plate sits on the equipment surface | Nominal dimensions and permitted limits |
| Hole centres and pattern | Controls alignment with the equipment base | Centre-to-centre dimensions, reference edges, and pattern orientation |
| Hole diameter | Controls bolt clearance and installation effort | Nominal diameter, lower and upper limits, and measurement method |
| Plate thickness | Affects the fastener stack-up and seating | Nominal thickness and permitted limits |
| Hole edge condition | Prevents burrs from reducing clearance or damaging handling | Maximum burr or edge condition, with a clear visual or gauge check |
Castor buying guides commonly separate plate size, hole centres, and hole diameter because each dimension controls a different part of the fit.[1] The DIN EN 12532 listing covers castors and wheels used up to 1.1 m/s, or 4 km/h; buyers should still state the exact mounting limits for their product.[2]
How Can Burrs Make a Correct-Sized Hole Fail Assembly?
Burrs are raised edges left after punching or forming. They can reduce effective clearance even when the opening appears close to nominal size.
Technical punching guidance from Amada’s NCT Handbook notes that worn or dull tooling can increase burrs and contribute to smaller or inaccurate punched holes.[3] Other possible contributors include punch-to-die clearance, alignment, material thickness, and the condition of the plate tool. A burr is therefore a useful warning sign, not proof of one cause.
Use this order when a castor plate does not assemble smoothly:
- Check the hole edge under consistent lighting. Record where the burr appears and whether it is raised, torn, or rolled over.
- Measure the hole with a calibrated gauge suitable for the tolerance. Check more than one direction when the opening may be oval or distorted.
- Compare the measured result with the approved drawing and a known-good sample. Do not accept a visual comparison as a dimensional result.
- Check the bolt or fixing element through the hole without forcing it. This confirms function, but it does not replace dimensional measurement.
- Ask the supplier to compare the result with the tool condition, punch and die clearance, and alignment records.
What Should Buyers Put in the Castor Plate Specification?
Write the requirement so the supplier and buyer measure the same feature in the same way.
At minimum, the specification should include:
- the hole’s nominal diameter and lower and upper limits;
- hole-centre dimensions from named datums, not only a general plate size;
- plate length, width, and thickness;
- the permitted burr or edge condition;
- the gauge or measurement method and the measuring location;
- the sample quantity and production stage for first-piece approval;
- the functional pass condition, such as a specified fixing passing through without force or damage.
Avoid writing only “14 mm hole” or “must fit”. Those phrases leave the tolerance, burr limit, measurement method, and pass condition open to interpretation. A clear requirement also helps buyers compare quotations without reducing the decision to price alone.
How Should Buyers Inspect Castor Plates Before Assembly?
Use a short inspection record that joins appearance, dimensions, and function.
| Check | Record | Pass condition |
|---|---|---|
| Plate and hole pattern | Actual plate and centre dimensions | Matches the approved drawing within its stated limits |
| Hole diameter | Actual result, gauge, and direction measured | Every checked result is within the agreed limits |
| Burr and edge condition | Location and severity of any raised edge | Meets the stated edge requirement and does not obstruct fixing |
| Fastener trial | Fixing type and installation behaviour | Passes through and seats without force, damage, or rework |
| Comparison sample | Sample identity and visual differences | No unexplained change from the approved reference |
For a new castor specification, agree the inspection stage before production begins. A first-piece check can catch tool drift early. An incoming check confirms that the delivered part still matches the approved interface. The exact sampling level should follow the buyer’s quality plan and the risk of assembly failure.
Conclusion
Prevent castor mounting-hole fit problems by specifying the complete interface, limiting burrs, measuring actual holes, and checking fastener fit before assembly.
Related Reading
References
- Parnells, Castor Buying Guide.
- DIN, EN 12532 standards listing.
- Amada, NCT Handbook: Burrs and Tool Wear.