When it comes to installing stem casters, getting it right is critical to the longevity and performance of the equipment or furniture they support. Whether you’re installing casters on wooden furniture, metal equipment, or other materials, following the proper steps will help you avoid common problems like instability or premature wear. In this comprehensive guide, we’ll walk you through the detailed process of installing a stem caster, give you some insights into the tools you’ll need, and answer some common questions that come up during installation.
To install a stem caster correctly, start by preparing the mounting surface, making sure it’s clean and the right size for the caster. Insert the caster stem into the predrilled hole or sleeve, and secure it with a lock nut or appropriate fastener. Make sure the caster is level and seated firmly before testing for stability and smooth movement.
Let’s go through each step in more detail to make sure you get it right.
Steps to Install a Stem Caster
1. Prepare the Mounting Surface
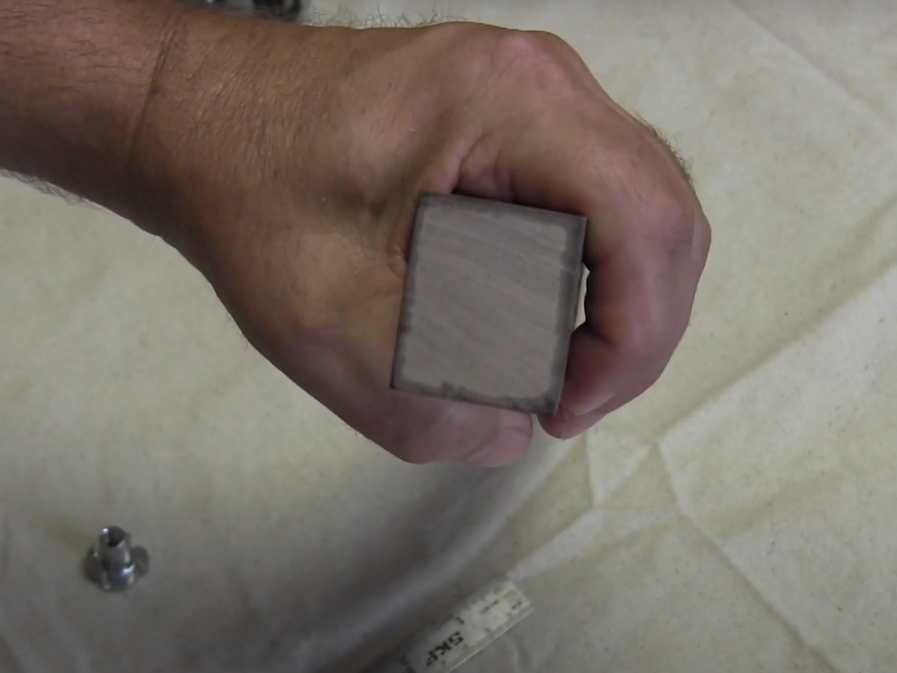
The first step in installing a stem caster is to ensure that the mounting surface is adequately prepared. This involves cleaning the area where the caster will be installed. Dirt, dust, oil, or any debris on the surface can interfere with the caster’s stability and adhesion. Use a damp cloth or a cleaner suitable for the material to wipe down the surface. This is particularly important for surfaces like wood or metal, where contaminants can prevent the caster from seating correctly.
2. Measure and Drill Holes

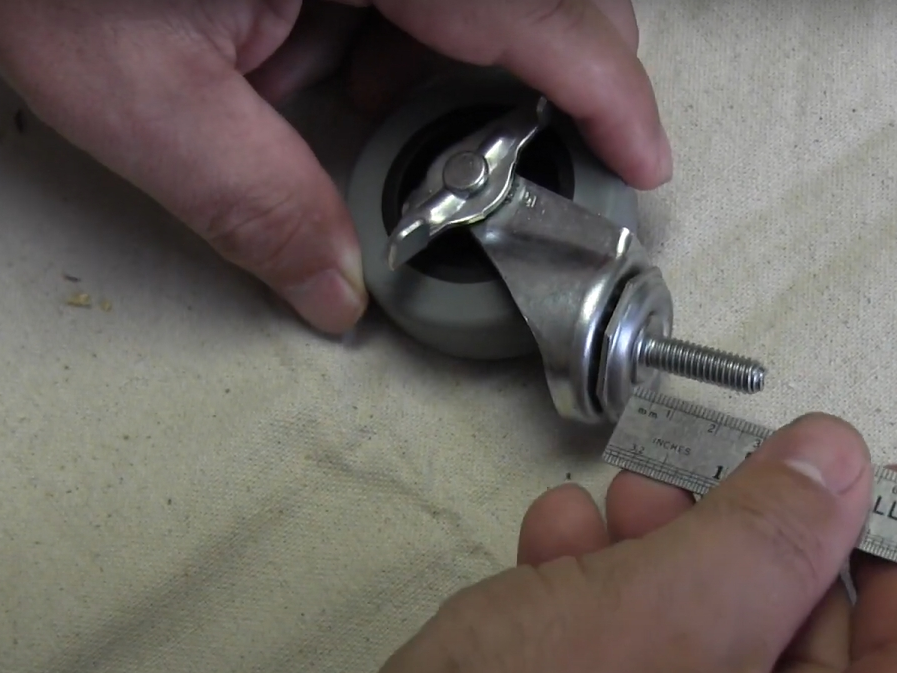
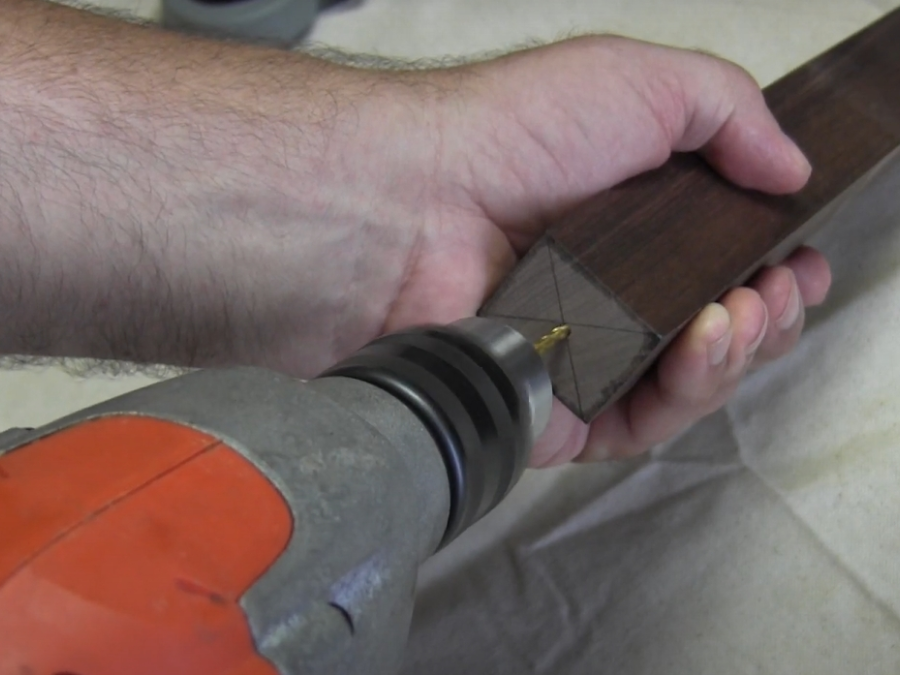
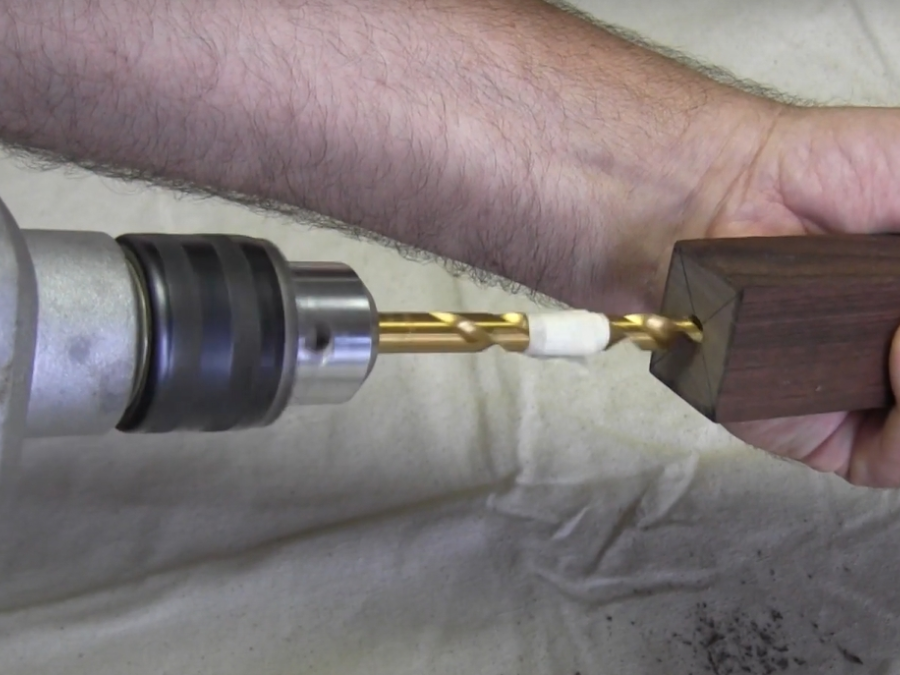
Accurate measurement is key to a secure installation. For threaded stem casters, you’ll need to drill a hole that matches the diameter of the stem. The hole should be deep enough to accommodate the entire length of the stem without leaving any gaps. If you’re using a socket or sleeve-based caster, the hole should be slightly longer than the sleeve’s length to ensure a snug fit. Use a measuring tape to determine the exact placement of each hole, ensuring that the casters will be evenly spaced and aligned. When drilling, hold the drill steady and drill straight to avoid angled holes, which can lead to instability.
- Tip: Use a piece of tape on the drill bit to mark the desired depth. This will help you drill consistently deep holes without going too far into the material.
3. Insert the Stem Caster
The method for inserting the stem caster will vary depending on the type of stem:
- Threaded Stem Casters: Threaded stems work much like screws. Start by aligning the stem with the pre-drilled hole, then turn it clockwise to thread it into the material. You may need to apply some pressure as you turn to ensure the threads bite into the material. Continue turning until the stem is fully seated and snug.
- Grip Ring Stem Casters: These casters have a metal ring around the stem that grips the inside of the hole or sleeve. To install, align the stem with the hole or sleeve and push it in. If it resists, use a rubber mallet to gently tap the caster into place, ensuring that it’s fully seated. Be careful not to hit too hard, as this can damage the caster or the surface.
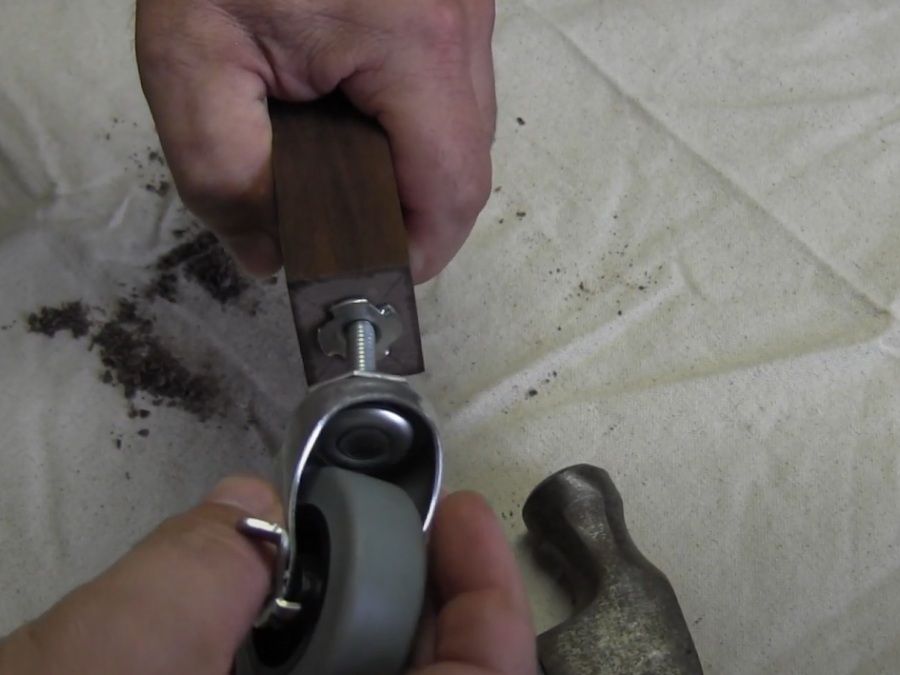
4. Secure the Caster

Once the caster is inserted, it needs to be secured to prevent it from loosening over time:
- Threaded Stems: After inserting the threaded stem, you’ll need to secure it with a lock washer and nut. The lock washer helps prevent the nut from loosening due to vibrations or heavy use. Place the washer over the stem on the opposite side of the mounting surface, followed by the nut. Tighten the nut using a wrench or socket set, ensuring it’s secure but not over-tightened, which could strip the threads.
- Expanding Stem Casters: These casters are designed to expand inside the hole as the stem is tightened. After inserting the caster, use a wrench to tighten the stem. As you do so, the insert inside the hole will expand, creating a tight fit that holds the caster securely in place.
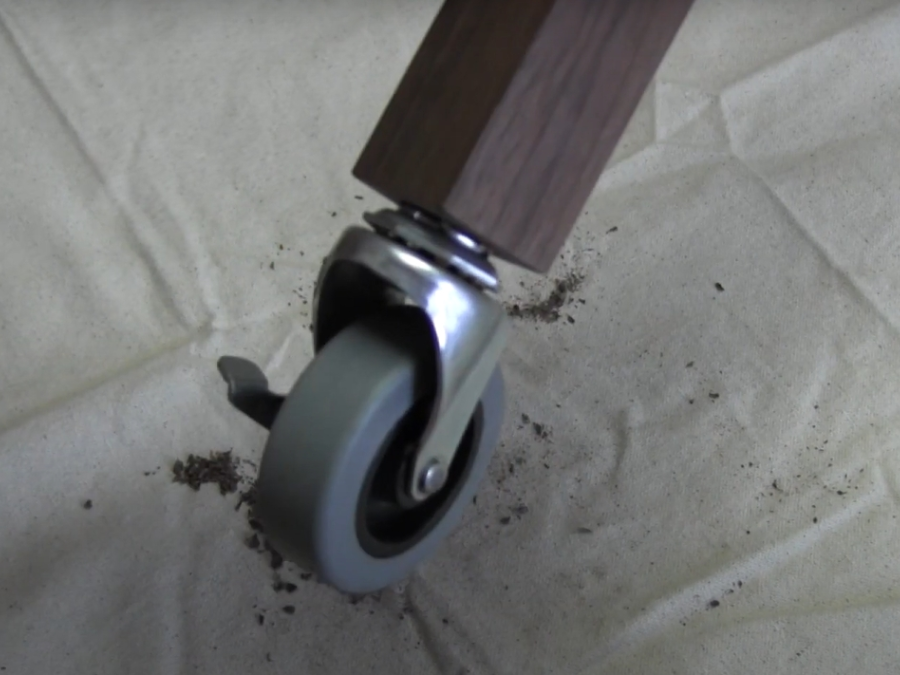
5. Check for Level and Stability
After securing all the casters, it’s essential to check that they are level and that the object they’re attached to sits evenly. Place the object on a flat surface and check for any wobbling or unevenness. If the object wobbles, it may indicate that one or more casters were installed at an angle or that the surface was uneven during installation. Adjust as necessary to ensure that all casters touch the ground evenly.
- Tip: Use a spirit level to check the alignment of the casters and the overall balance of the object. This is especially important for heavy or large items where stability is critical.
6. Final Adjustments
After confirming that the casters are level and the object is stable, make any final adjustments needed. Ensure that all fasteners are tight and that the casters move smoothly. Test the mobility by rolling the object across the floor, checking for smoothness and ease of movement. If you notice any resistance or unusual noise, double-check the installation to ensure everything is secure.
People Also Ask Questions
1. What Tools are Needed for Caster Installation?
Installing stem casters requires a few essential tools to ensure a secure and precise installation:
- Drill: A power drill is necessary for creating holes in the mounting surface. Choose a drill with variable speed settings for better control.
- Drill Bits: Select drill bits that match the size of the caster stems. For threaded stems, the bit should be slightly smaller than the stem diameter to allow the threads to grip the material. For grip ring or sleeve casters, the bit should match the sleeve diameter closely.
- Rubber Mallet: This tool is useful for gently tapping grip ring stem casters into place without damaging the material or the caster itself.
- Wrench or Socket Set: These tools are needed for tightening nuts and bolts, especially when securing threaded stem casters. Ensure you have the correct size wrench or socket to fit the nuts used in your installation.
- Measuring Tape: Accurate measurements are crucial for proper alignment and spacing. Use a reliable measuring tape to mark hole locations before drilling.
- Level: A spirit level helps ensure that the casters are installed evenly, preventing wobbling and ensuring smooth movement.
- Tip: Having a pencil or marker handy to mark drill points can also help improve accuracy and ensure your casters are perfectly aligned.
2. What are the Best Types of Stem Casters for Different Materials like Wood or Metal?

The type of stem caster you choose should depend on the material of the mounting surface to ensure a secure and durable fit:
- For Wood: Grip ring stem casters are ideal for wooden surfaces. These casters feature a metal ring around the stem that expands to grip the inside of the hole, providing a strong hold without damaging the wood. They’re particularly suited for applications where the wood might be soft or prone to splitting.
- For Metal: Threaded stem casters are the best option for metal surfaces. The threaded stem screws directly into pre-drilled holes in the metal, providing a tight and secure fit. This type of caster is often used in industrial or heavy-duty applications where durability and load-bearing capacity are critical.
- For Other Materials: If you’re working with materials like plastic or composite, consider the material’s density and hardness when choosing a caster. Threaded stems may work well with harder plastics, while grip ring stems may be better suited for softer materials.
- Tip: Always match the caster’s load capacity with the weight of the object it will support. Choosing a caster that can’t handle the load can lead to premature failure.
3. Are There Any Common Mistakes to Avoid When Installing Casters?
Even with the right tools and instructions, certain mistakes can compromise the effectiveness of your caster installation. Here are some common pitfalls to watch out for:
- Improper Hole Size: Drilling a hole that’s too large or too small for the caster stem can result in a loose or unstable fit. Always measure carefully and choose the correct drill bit size to ensure a snug fit. A hole that’s too large can cause the caster to wobble or come loose over time.
- Incorrect Fastening: Using the wrong type of fastener or not tightening the nut properly can cause the caster to loosen with use. For threaded stems, always use a lock washer and nut to secure the caster. For other types of stems, ensure they are fully seated and secure.
- Ignoring Weight Limits: Exceeding the weight capacity of the casters can lead to damage or failure, especially if the object is frequently moved. Check the manufacturer’s specifications to ensure the casters you select can support the total weight of the object.
- Over-Tightening: While it’s important to secure casters tightly, over-tightening the nuts or screws can strip threads or damage the material, leading to a weaker installation.
- Inadequate Maintenance: Casters can loosen over time due to vibrations and regular use. Periodically check that all casters are still securely attached and make any necessary adjustments.
4. How Do You Ensure the Stem Caster is Securely Attached to Prevent It From Coming Loose Over Time?
To prevent your stem casters from loosening over time, follow these tips:
- Use Lock Washers and Nuts: For threaded stems, always use a lock washer and nut to secure the caster in place. The lock washer prevents the nut from backing off due to vibrations or movement, ensuring a long-lasting, secure fit.
- Check Regularly: Regular maintenance is key to keeping your casters secure. Periodically check that all casters are still tight and make adjustments as needed. This is especially important in high-traffic areas or for objects that are moved frequently.
- Use the Right Caster for the Surface: Ensure that the caster type is appropriate for the material it’s being installed on. For example, using a grip ring stem caster on metal may not provide a secure fit, while a threaded stem might be overkill for a soft wooden surface.
- Consider Threadlocker: For an extra level of security, consider using a threadlocker adhesive on the threads of the stem before installation. This adhesive helps prevent the nut from loosening over time but still allows for removal if necessary.
Summary
Properly installing a stem caster is critical to the smooth operation and longevity of the item it’s attached to. By following the steps outlined in this guide, using the right tools, and avoiding common mistakes, you can ensure that your stem casters stay secure and functional for years to come. Regular checks and maintenance will also extend the life of your installation, ensuring that your furniture or equipment moves smoothly and safely whenever you need it.